Styling how-tos
Heatless waves: choose a set you can actually wear
Make loose waves with braids, soft rollers or a wrap, with preparation, drying checks and fixes for uneven bends.
Upkeep: Repeat the set when you want the shaped finish; allow a separate drying period each time. No salon service is required for the loose-braid, roller or wrap methods.
Effort is a planning estimate. The specific option and your routine change the commitment.

The starting point
Choose the shape before choosing the tool. Braids make repeated bends; larger soft rollers create a rounder wave; a fabric wrap gives a more continuous spiral. Start with a small trial on a day without a deadline. Heatless describes the method, not a promise of identical results on every texture.
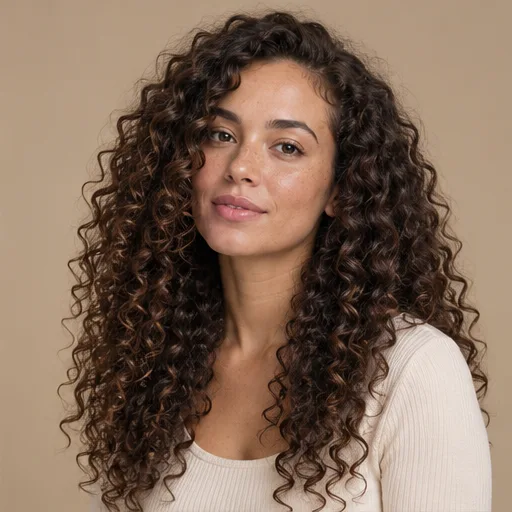
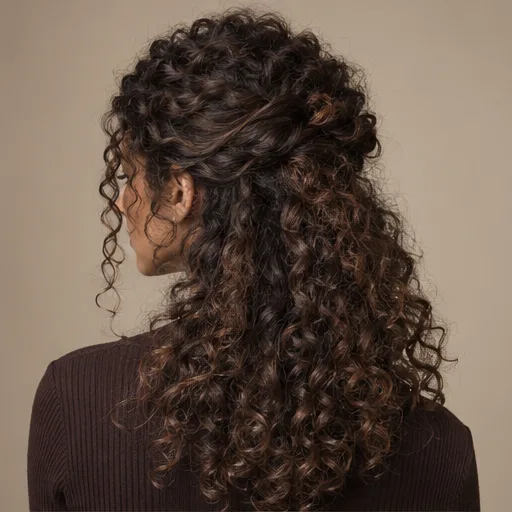
Compare the visual directions
Concept references for shape and placement. Use the differences you like in your consultation; these are not step-by-step results or predictions for your hair.

Compare your options
Two or four loose braids
Best for repeated bends and an easy first experiment. More braids produce smaller sections and a busier pattern; fewer give broader bends. Short layers may escape, which can be part of the finish.
Ask about: Can my shortest layers stay in a loose braid, and where should I stop braiding the ends?
Large soft rollers
Choose these for rounder movement and more control over individual short sections. They require patient placement and enough drying time inside each roll. Keep the scalp comfortable and avoid stretching a section to reach its fastener.
Ask about: Which roller size gives the bend I want without requiring too much hair length?
Fabric wrap
Useful when longer front sections can wrap around a soft form. It can create a more continuous curl, but the back may need a separate section and the wrap should not depend on tight roots.
Ask about: Would a wrap suit my layers, or would separate rollers give a more even result?
Start with a realistic set
For the two-braid method below, hair should reach far enough past the nape to braid without pulling shorter pieces into place. Start with detangled, lightly damp hair rather than saturated hair. Have two soft snag-free ties, a comb for the part, a spray bottle and optional light styling foam ready. Dense hair may need four sections to dry through; short layers may need individual soft rollers instead.
Allow an estimated 10–20 minutes to section and braid, then separate drying time that may take several hours. A test day gives a better estimate than a universal overnight promise. Check the inside of a braid before undoing everything. Wet or cool-feeling inner sections need more time. Avoid a set that makes sleep uncomfortable; a daytime set is a valid option.
Two loose braids, step by step
Aim for consistent section size and relaxed roots. This creates a deliberate wave through the lengths without trying to flatten your natural hairline.
- Place your part where you want it in the finished style. Separate the hair into two sides and clip one aside. Gently detangle the loose side from ends upward before braiding.
- Lightly mist any sections that dried while you worked. If using foam, distribute a small label-directed amount through the lengths. Hair should feel manageable, not coated or dripping.
- Divide the first side into three similar strands. Cross the outer right strand over the middle, then the outer left over the new middle. Repeat down the length while keeping your hands near the section you are crossing.
- Keep the braid relaxed at the scalp. Stop before short or thin ends become difficult to hold, and secure with a soft tie. Repeat on the second side at a similar height.
- Wait until both braids are dry throughout. Release each tie and reverse the crossings gently. Separate with fingertips only as much as needed to join the sections.
- Check the back with a mirror. If the central part looks too distinct, loosen the roots with fingertips; leave the wave lengths alone while they settle.
A soft-roller route for rounder bends
Begin with detangled, lightly damp hair and soft rollers whose fasteners you can use without pulling. Have clips, a comb and a mirror ready. Plan an estimated 15–30 minutes for sectioning and rolling, followed by several hours or more of separate drying as needed. Choose rollers that can comfortably contain your section length; a small trial is more useful than assuming one size gives the same bend on every head.
- Set the part and clip away the hair above the area you will roll first. Take a section no wider than the roller, thin enough that you can smooth and dry it through.
- Place the ends smoothly against the roller, then roll upward toward the head in the direction you want the finished bend. Stop before the roots feel stretched.
- Secure using the roller’s own fastening method. Reopen and reposition any roller that pulls or presses; do not make its hold depend on root tension.
- Repeat in similar sections. Use separate smaller sections for short layers rather than forcing them to reach a neighboring roller. Leave the set until the inside of the rolled hair is dry.
- Release each fastener and unwind the roller along the hair instead of dragging it out sideways. Let the released shape rest before handling.
- Separate with fingers for clearer bends, or gently brush only if you deliberately want a softer, fuller finish. If the result is too tight, use larger rolls or fewer turns on the next test.
A fabric-wrap route for longer hair
Use a purpose-made soft wrap with its own instructions and fastenings, plus a comb and clips. Start with detangled, lightly damp hair long enough to travel around the wrap without pulling. Estimate 10–25 minutes of active wrapping, with separate drying that may take several hours. This route is less convenient when many short layers cannot reach; individual rollers can handle those sections more directly.
- Set your part and divide the hair into two sides. Position and secure the wrap as its instructions show, checking that its support does not press or pull on the scalp.
- On the first side, take a small front section and wind it around that side of the wrap, usually away from the face for an opening front. Keep the roots relaxed.
- Add a small section of adjacent loose hair before the next turn. Continue adding and wrapping down the side, guiding the ends so they do not fold or tangle.
- Include back hair only while it reaches comfortably. Give any leftover back section its own loose braid or roller instead of stretching it across the head. Secure the wrapped ends with the supplied fastening or a suitable soft tie.
- Repeat on the other side in the corresponding direction. Reposition any uncomfortable area and let the whole set dry through; remove it if it shifts into a pulling position.
- Release the ends and unwind the hair in reverse order. Lift the wrap away after the hair is free, then separate gently with fingers. If one side is tighter, compare section size and wrap direction at the next trial.
Adapt the method to your texture
Straight hair may show a clearer repeated zigzag than a rounded wave. Start with larger sections for softer bends, and compare a small amount of hold product with none. Fine strands can become weighed down quickly, so do not automatically add oil after release. On naturally wavy hair, braid loosely enough that the set guides your movement instead of compressing it.
Curly and coily hair may produce an elongated braid-out rather than loose straight-hair waves. Define the intended result in those terms. Detangle in manageable damp sections with suitable slip, then separate dry sections gently. A two-strand twist-out is another shape choice, but it is not the same pattern as a three-strand braid-out. Existing locs need a separate styling plan rather than this detangling sequence.
Fix the specific problem
If one side looks tighter, compare braid size and starting height next time. If the ends look straight, leave less loose tail or choose rollers that can contain the ends comfortably. If a visible tie kink remains, lightly dampen just that area and reshape it with your fingers; allow it to dry before judging the result.
If the set falls quickly, check whether it was fully dry before adding more product. Very heavy layers of product can also make the finish limp. An uneven result can become a loose half-up style without starting over. Stop any set that pulls or hurts; AAD explains tension precautions at aad.org source.
Take this to your appointment
A starting point for your brief
I want a heatless routine that makes a soft bend using my current texture. Please show me the section size and starting dampness for my hair, confirm whether my shortest layers can be included, and suggest a fallback half-up shape. I can spend about ___ minutes setting and ___ hours drying.
Use this in my briefAdapt the wording to your own hair, preferences and history.
Common questions
Does heatless mean I should start with wet hair?
No. This braid method starts lightly damp. Saturated sections may stay wet inside the braid, and a longer drying period does not guarantee a better wave.
Can I brush the waves afterward?
You can choose a brushed-out finish, but it may look much fuller and softer. Start with fingers so you can see the set before deciding whether to brush.
Sources & further reading
Sources accessed 3 October 2026. These publishers have not reviewed this guide. Our editorial standards explain our method.