Styling how-tos
Fishtail braid: the two-section method and useful variations
Learn the two-section fishtail transfer, choose small or broad pieces, and adapt it for a side braid, ponytail or half-up detail.
Upkeep: A loose daily or event style, not an installation that needs to stay tight. Secure the tail with a comfortable tie and take it down if the roots pull.
Effort is a planning estimate. The specific option and your routine change the commitment.
The starting point
A fishtail uses two large sections. A small piece from the outside of one section crosses to the inside of the other, then you repeat from the opposite side. The small transfers make the interlaced pattern. It is different from the three working strands of a conventional braid.
Compare the visual directions
Concept references for shape and placement. Save the specific look you like and open its details. These are starting points for a consultation.
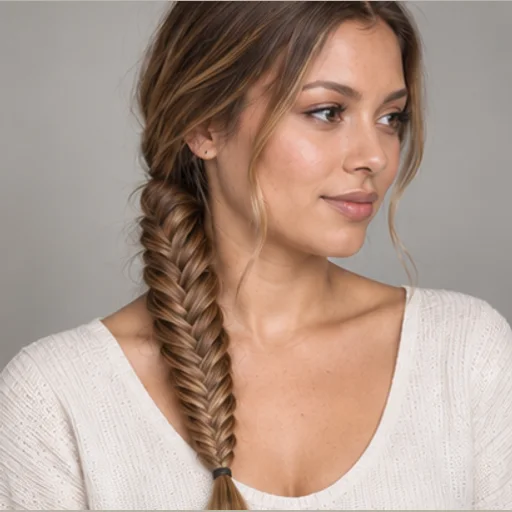
Side fishtail with a fine woven pattern
Fine alternating crossings form a narrow herringbone-like braid over one shoulder.
Moderate styling effort · Long lengthDetails & styling for Side fishtail with a fine woven pattern
Choose it for: A visible side detail that is easier to watch while learning.
Think about: The opposite-side pieces must reach comfortably. Smaller transfers make a finer pattern but take more repetitions.
A routine to discuss
- Divide the gathered hair into two large sections.
- Transfer a small outside piece across to the inside of the opposite section, alternating sides.
- Secure the tail and soften only as much as you want.
Upkeep: Allow time for repeated small transfers and stop to rest your hands when needed.
Your salon request: I like this fine side pattern and want the base comfortable, with ___ front pieces left loose.
Use this look in my brief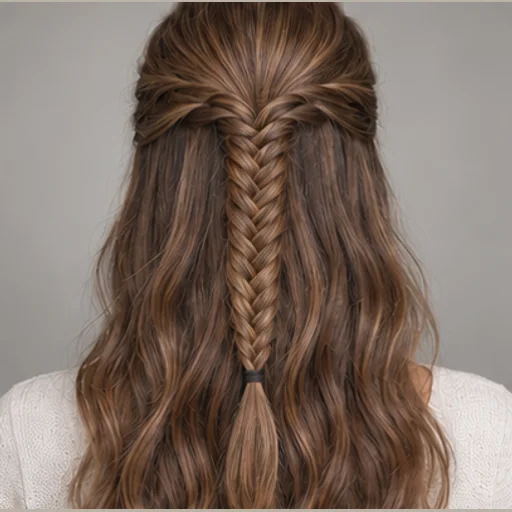
Half-up fishtail detail
A narrow woven upper section sits above loose waves down the back.
Moderate styling effort · Long lengthDetails & styling for Half-up fishtail detail
Choose it for: A distinct rear braid detail while preserving most of the loose length.
Think about: The waves and braid are separate steps. Keep the lower hair out of the weave to avoid unintentionally gathering more.
A routine to discuss
- Prepare the loose base finish.
- Gather the upper sections that reach comfortably and use the two-section fishtail transfer.
- Stop at the chosen detail length and secure.
Upkeep: Carry a spare matching fastener and a plain half-up fallback.
Your salon request: I want a narrow fishtail detail at ___ with the lower hair left loose and ___.
Use this look in my brief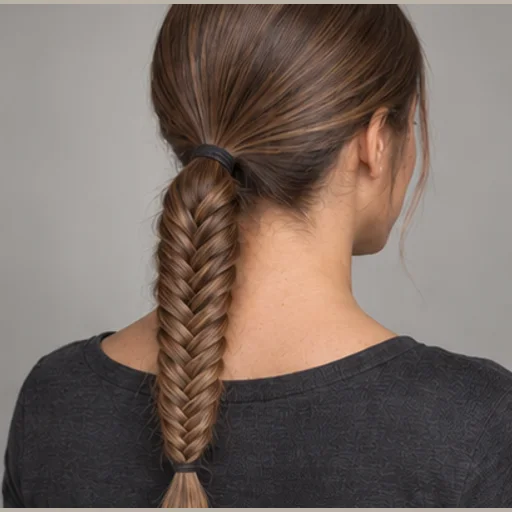
Low ponytail woven into a fishtail
A low tied base leads into a broad fine-patterned fishtail tail.
Moderate styling effort · Long lengthDetails & styling for Low ponytail woven into a fishtail
Choose it for: A defined ponytail base with more detail through the length.
Think about: The tie supplies the gathering point; the weave supplies the tail pattern. Do not tighten the root to correct gaps in the weave.
A routine to discuss
- Make a comfortable low ponytail.
- Divide the tail into two and alternate small outside-to-opposite transfers.
- Secure the end and test the base for comfort.
Upkeep: The woven tail can be released separately from the low ponytail if needed.
Your salon request: I want this low base and woven tail, with ___ smoothness at the crown and comfortable front tension.
Use this look in my briefCompare your options
Side fishtail
Bringing the hair over one shoulder makes the transfer visible and lets your arms stay lower. It is a useful first full-length version.
Ask about: Do the opposite-side front pieces reach comfortably, or should some stay loose?
Ponytail fishtail
A loose ponytail establishes the base before you start the two-section weave. It separates gathering the hair from learning the pattern.
Ask about: Where can the ponytail sit without pulling at the hairline?
Half-up fishtail detail
Only the upper section is woven, with the rest left down. This uses less hair and keeps the look softer, but very short crown layers may escape.
Ask about: How much hair should join the detail, and where should the braid stop?
Broad, softened fishtail
Larger transfers create a coarser pattern more quickly. Small transfers create a finer pattern and require more repetitions.
Ask about: Do I prefer a fine weave or a broad visible texture?
Set up a visible practice version
Use comfortably detangled hair, a mirror and a soft tie. A loose side ponytail is a useful practice base if the hair reaches without strain. If you want to remove that first tie afterward, choose one that releases easily without snagging the braid.
This pattern involves repeated small transfers, so leave enough time to work slowly. If the hair tangles at the ends, pause to separate it gently instead of pulling a piece through a knot. For a first attempt, larger transfers make the process easier to track.
Build the weave, one transfer at a time
The two main sections remain in your hands throughout. Only a small outer piece moves across on each turn.
- Divide the gathered hair into two approximately equal sections: left and right.
- Take a small piece from the outside edge of the left section. Bring it across the front of that section and join it to the inside edge of the right section.
- Take a similar-sized piece from the outside edge of the right section. Bring it across the front and join it to the inside of the left section.
- Repeat left-to-right and right-to-left transfers. Keep the two large sections separate so you do not accidentally start a three-strand braid.
- Pause occasionally to check that the transferred pieces are similar in size. Continue until the remaining ends are too short to weave comfortably.
- Secure the tail. For a softer shape, support the braid and ease the outer edges slightly; do not tug the whole arrangement from the roots.
Diagnose a pattern that is disappearing
If it looks like a simple twist, check that the pieces are crossing from the outside of one section into the other, rather than wrapping both large sections around each other. If the weave has big gaps, the transferred pieces may be too loose or uneven for the finish you wanted.
If one side becomes much larger, you may be transferring more hair in one direction. Work with more comparable pieces or stop and rebalance before continuing. For wispy layers, a few loose ends are normal; a more textured finish can accommodate them without excessive product.
Choose an achievable variation
For a half-up detail, gather the upper section and use the same two-section pattern. Leave lower hair separate so you do not unintentionally turn it into an added-hair braid. For a ponytail version, secure the base first and start the weave below it.
If you find repeated small hand movements difficult, choose larger transfers, a shorter decorative segment or a conventional three-strand braid. A different method can meet the same styling goal with less strain. You do not need to finish the entire length to make the detail look intentional.
Take this to your appointment
A starting point for your brief
I want a fishtail as a side braid / ponytail / half-up detail. The pattern should be fine / broad and soft. Keep the base comfortable and show me a short section I can practise with my arms lower.
Use this in my briefAdapt the wording to your own hair, preferences and history.
Common questions
Is a fishtail a two-strand twist?
No. The two main sections stay separate while small outer pieces transfer across. A two-strand twist wraps the whole sections around each other.
Can I do it on shorter hair?
A full gathered fishtail needs the working lengths to reach the chosen base. A small half-up detail may be possible earlier, while very short layers will need to remain outside.