Styling how-tos
French versus Dutch braids: learn the over-and-under difference
Follow separate French and Dutch braid sequences, learn when to add hair, and troubleshoot loose roots, uneven sections and awkward hand changes.
Upkeep: This is a temporary arrangement. Loosen or remove a braid that pulls; neatness should come from orderly sections rather than painful tension.
Effort is a planning estimate. The specific option and your routine change the commitment.
The starting point
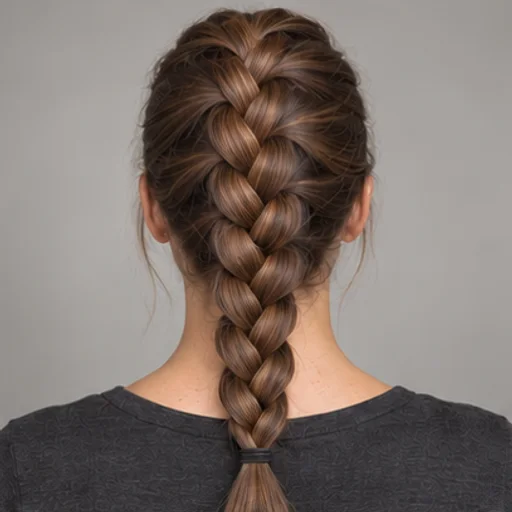
Both French and Dutch braids start with three working strands and collect loose hair as they travel. In a French braid the outside strand crosses over the middle. In a Dutch braid it crosses under. That one direction change makes the Dutch braid sit more prominently above the surface. The image is a braid-direction reference; the instructions below teach a single beginner braid.
Compare the visual directions
Concept references for shape and placement. Save the specific look you like and open its details. These are starting points for a consultation.
Single raised Dutch braid
A prominent central braid travels down the back and into a three-strand tail.
Moderate styling effort · Long lengthDetails & styling for Single raised Dutch braid
Choose it for: A raised route that gathers the sides as it travels.
Think about: The photo shows the outline, not every hand movement. Under-crossing and added sections create the structure.
A routine to discuss
- Begin with three sections and cross the outside strands under the middle.
- Add loose hair to each outside section before its next under-crossing.
- Continue down the route, then braid the tail without adding hair.
Upkeep: Keep comfortable tension and undo the style if it pulls.
Your salon request: I like the raised centre route. Please show the under-crossing and a section size I can manage.
Use this look in my brief
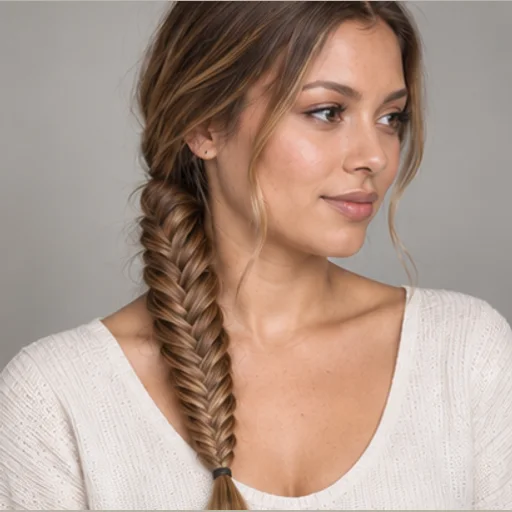
Two loose three-strand braids
Two separate low plaits keep the length organised on either side.
Low styling effort · Long lengthDetails & styling for Two loose three-strand braids
Choose it for: A simple route with fewer hand changes than an attached braid.
Think about: Short front layers may remain outside. The pictured placement does not require collecting every strand tightly.
A routine to discuss
- Part into two manageable sections.
- Cross each outside strand over the middle alternately down the length.
- Secure softly and check that the roots remain comfortable.
Upkeep: Remove and reset as needed; the arrangement should not depend on continuous tension.
Your salon request: I want two loose plaits with the front ___ and enough comfort for ___.
Use this look in my brief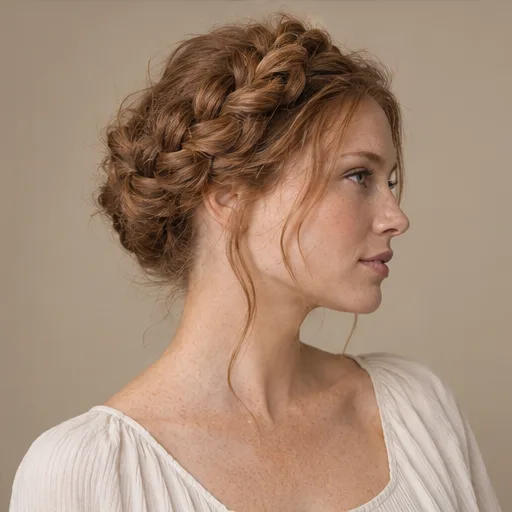
A loose braid around the crown
The braid wraps around the head, redistributing the length rather than leaving a long tail. A looser outer shape changes the result more than adding decoration.
High styling effort · Long lengthDetails & styling for A loose braid around the crown
Choose it for: A contained braided outline with a visible woven detail.
Think about: The pictured looseness needs sufficient length and support. A short version may require a different construction or professional help.
A routine to discuss
- Practise a loose side braid before attempting the wrapped arrangement.
- Place the braid around the head without stretching the roots, then secure the ends at stable points.
- Check the weight and comfort around the hairline.
Upkeep: Unpin and unwrap the braid fully before combing; start removing tangles at the ends.
Your salon request: I like the braid placement around ___. Keep the front ___ and tell me whether my length can support this arrangement.
Use this look in my briefCompare your options
One French braid
An over-the-middle crossing creates an integrated, flatter-looking route down the head. A single back braid gathers most of the hair while leaving one tail.
Ask about: Do my front layers reach the first collection point, or should they stay outside?
One Dutch braid
An under-the-middle crossing creates a more raised line. The added sections feed underneath as the outside strands change places.
Ask about: Would a side practice braid make the under-crossing easier to see first?
Two braids
A centre or chosen part divides the work into two smaller routes. This can collect shorter side lengths, but it requires repeating the pattern with a different hand angle.
Ask about: Where should the part sit and how low should each tail finish?
Partial front braid
A short route at one side gathers a few front sections without requiring a full back-of-head braid. It gives a manageable way to practise the crossing.
Ask about: Where can I stop and secure it without pulling the shortest pieces?
Prepare a manageable practice section
You need a mirror, a comb or fingers for sectioning, a soft tie, and clips to keep unused hair away. Start on comfortably detangled hair in a state that is easy for you to handle. Product is optional; a little familiar styling product may reduce flyaways, but more does not replace clear sections.
Practise the crossing first with three loose strands in front of your shoulder. Then try a small side section where you can see your hands. A full back braid adds arm position and hidden sections to the same pattern. Pause when your arms tire rather than gripping harder.
French braid: cross over, then add
Think of the strands by their current position. Each time an outside strand crosses into the middle, the old middle becomes an outside strand.
- Take a comfortable section near the top of the intended route. Divide it into left, middle and right strands. Keep the rest of the hair separate.
- Cross the right strand over the middle; it is now the middle strand. Cross the left strand over the new middle. This anchors one ordinary three-strand cycle.
- Before the next right crossing, collect a small section of loose hair from the right side and join it to the right working strand. Cross that combined strand over the middle.
- Collect a section from the left side, join it to the left working strand, and cross the combined strand over the middle.
- Repeat right-add-over, left-add-over while following the route down the head. Keep the hands near the point you are working so the added sections do not hang far away from the scalp.
- When there is no loose hair left to collect, continue an ordinary over-crossing braid down the remaining length. Secure the tail comfortably.
Dutch braid: cross under, then add
Keep the collection pattern the same but reverse the crossing direction. Do not switch to over partway through unless that mixed construction is intentional.
- Divide the starting section into three. Cross the right strand under the middle, then cross the left strand under the new middle.
- Collect a little loose hair from the right and combine it with the right working strand. Pass the combined strand under the middle.
- Collect from the left, combine with the left working strand and pass under the middle.
- Repeat the add-under pattern down the chosen route, keeping track of which strand is currently outside.
- After all loose hair has joined, continue under-crossing the three strands down the tail and secure.
- Check comfort before adjusting the appearance. If you want a softer edge, gently ease a little hair outward from the braid loops while supporting the base; stop if the root area pulls.
Fix the specific problem
If the braid becomes an ordinary hanging plait too early, you probably stopped collecting loose hair. Undo only to the last useful point and resume adding from the sides. If it switches from raised to flat, the crossing direction changed. Slowing down and saying “under” or “over” can help.
Loose roots often come from holding the hands far from the head or collecting very large uneven sections. Bring the work closer and use more consistent sections next time. Do not solve that problem by yanking the braid tight. Short layers sticking out are not proof of failure; leave some out deliberately or choose two shorter routes.
Adapt the route and the comfort
Dense hair may be easier to organise in two routes. Long hair can tangle in the hanging strands, so gently separate the ends between crossings when needed. For curls or coils, decide whether you want the natural texture visible around the braid instead of smoothing it aggressively.
Pain, stinging or a visibly pulled scalp are reasons to loosen or remove the style. Repeated tension can cause hair loss; the AAD explains the warning signs at aad.org source. A style that remains comfortable is a better goal than collecting every short piece.
Take this to your appointment
A starting point for your brief
I want a French / Dutch braid following ___. Keep it comfortable at the temples and leave ___ front pieces loose. I would like to learn the crossing and section size so I can repeat a simpler version.
Use this in my briefAdapt the wording to your own hair, preferences and history.
Common questions
Do I add hair before or after crossing?
This sequence adds it to the outside strand before that strand crosses into the middle. Follow one sequence consistently while learning; the core distinction is still over for French and under for Dutch.
Why does my braid twist off centre?
Your added sections or hand position may be uneven. Check the route with a mirror, use comparable sections from each side and practise on a visible side section before retrying the back.
Sources & further reading
Sources accessed 3 October 2026. These publishers have not reviewed this guide. Our editorial standards explain our method.